Beastlord 2.0 Epic Guide
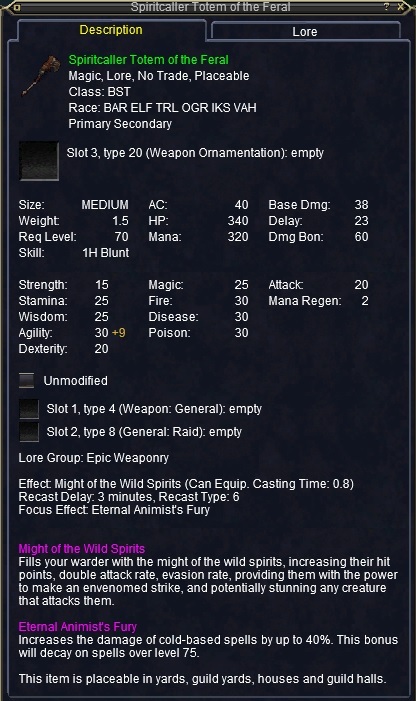
Spiritcaller Totem of the Feral![]()
To begin this quest you must have completed the Beastlord 1.5 Epic quest.
The following steps are pre-lootable:
Step 14 – Loot Globe of Discordant Energy in Anguish
Step 6 – Raise Baking, Blacksmithing, and Pottery to 100.
Step 1
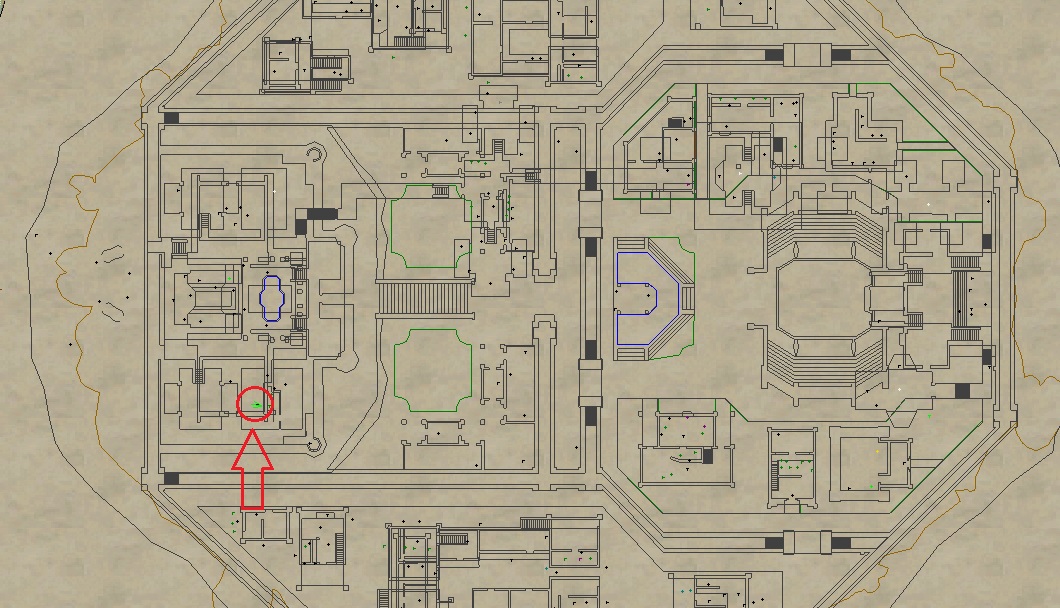
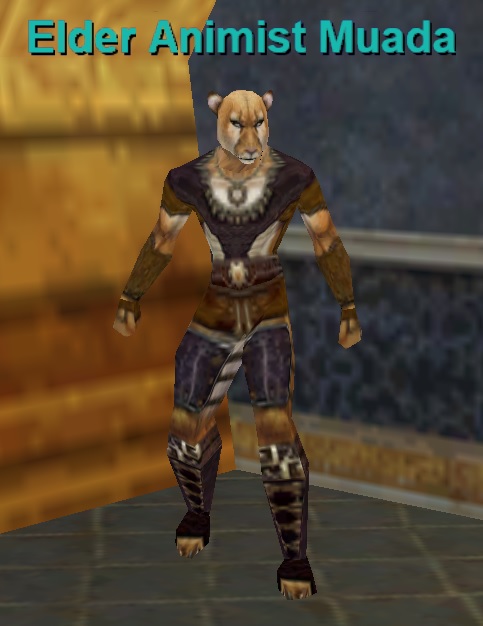
Go to Shar Vhal and locate Elder Animist Muada (-170, +460). Follow his dialogue:
Say “wish to continue to walk among the elder”
Say “know”
Say “learning”
Say “task”
Say “prepared”
Say “things”
Say “there is more”
Say “world”
Say “problem”
Say “make the totem”
At the point in which you say “task” you will receive ![]() Peculiar Unshapen Piece of Wood.
Peculiar Unshapen Piece of Wood.
Click Here to see the Full Dialogue
Step 2
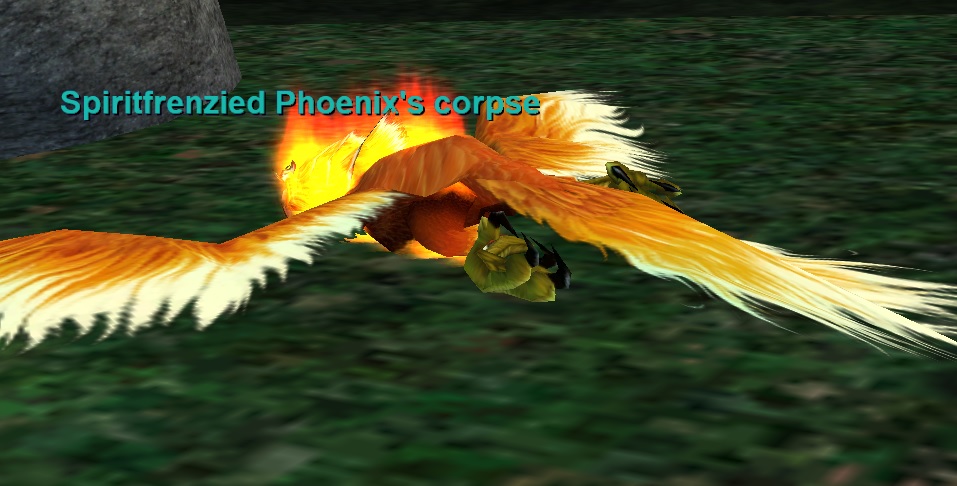
With a group, go to Plane of Air and head up to the Phoenix Island. On the West side of the Island you’ll see Spiritfrenzied Phoenix. This mob is an easy kill but may take a few players to get up to the island. Kill it and loot ![]() Fierce Spirit Clay.
Fierce Spirit Clay.
Step 3
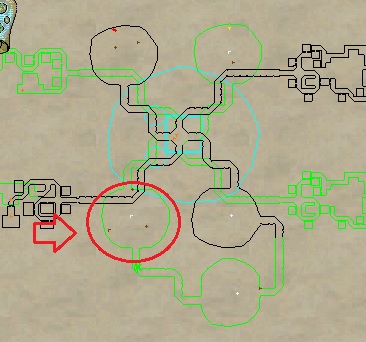
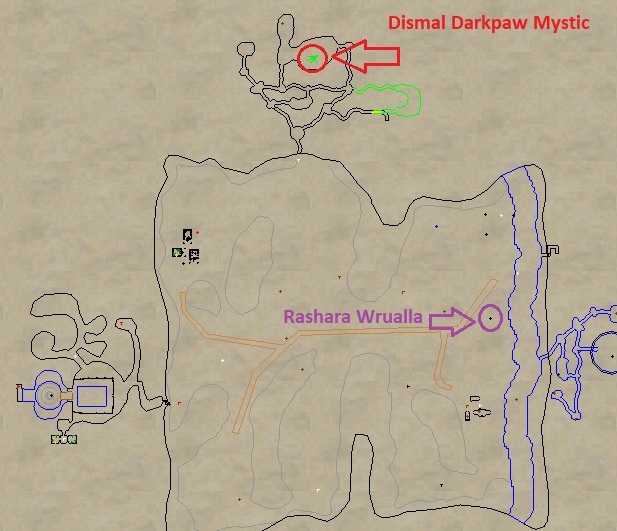
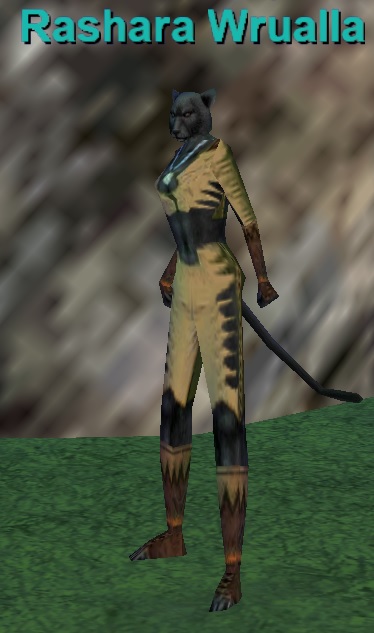
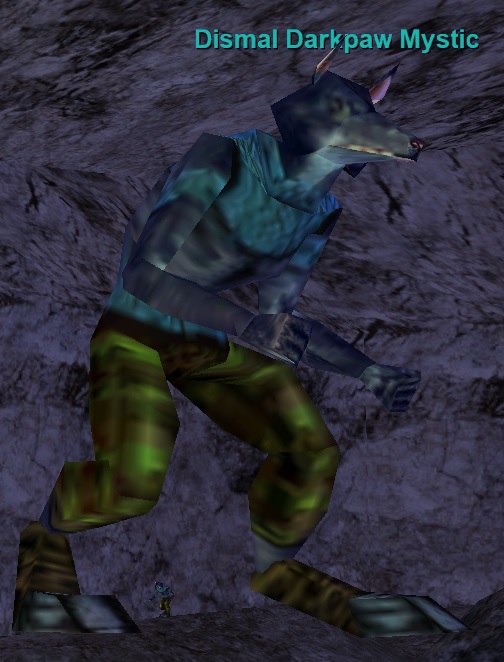
Go to Jaggedpine Forest with a couple groups and locate Rashara Wrualla (+310, -1590). “Hail” her. This will spawn Dismal Darkpaw Mystic in the north caves. Kill Dismal Darkpaw Mystic and loot ![]() Scalding Blood.
Scalding Blood.
– Hits for 900+
– Medium HP
– Casts Cessation of Health (PBAE, -750 DoT, Poison Based)
Step 4
Go to Grimling Forest and look for Grimling General and Grimling Colonel. Bring a tracker to help find them. They can roam. They are not that tough and you should be able to solo them at level 70. They both drop![]() Eerie Medallion. You will need
Eerie Medallion. You will need ![]() 2x Eerie Medallions.
2x Eerie Medallions.
**If they are not you can speak to Scout Husman in the Southeast camp and say “wish to end the threat in grimling forest”. He will emote. It might take up to an hour for either Grimling General or Grimling Colonel to spawn. If only one is up then kill it and you may have to wait up to an hour for the other to spawn after the death of the first — however they can be up at the same time.
Overall the spawn info on this is somewhat unclear. Your best strat is to say the phrase to Scout Husman and to keep coming back and checking with a tracker every hour or so.**


Step 5
Go back to Shar Vhal and locate Elder Animist Muada (-170, +460). Say “make the totem” to receive:![]() Elders’ Totem Mold and
Elders’ Totem Mold and ![]() Combined Essence.
Combined Essence.
Step 6
1) Level Baking to 100: Baking Guide
2) Level Blacksmithing to 100: Blacksmithing Guide
3) Level Pottery to 100: Pottery Guide
Step 7
Tradeskill Combines
1) Combine the following into a New Tanaan Kiln (in PoK) to create ![]() Gilded Resonating Clay:
Gilded Resonating Clay:
![]() Scalding Blood
Scalding Blood![]() 2x Eerie Medallion
2x Eerie Medallion![]() Fierce Spirit Clay
Fierce Spirit Clay
2) Combine the following in a New Tanaan Oven (in PoK) to create ![]() Malleable Glowing Totem:
Malleable Glowing Totem:
![]() Gilded Resonating Clay
Gilded Resonating Clay![]() Peculiar Unshapen Piece of Wood
Peculiar Unshapen Piece of Wood![]() Combined Essence
Combined Essence
3) Combine the following in a New Tanaan Forge (in PoK) to create ![]() Spiritbound Totem:
Spiritbound Totem:
![]() Malleable Glowing Totem
Malleable Glowing Totem![]() Elder’s Totem Mold
Elder’s Totem Mold

Step 8
Go back to Shar Vhal and locate Elder Animist Muada (-170, +460). **don’t give him your Spiritbound Totem**
Say “finished with this important duty”
Say “trapped spirits”
Step 9
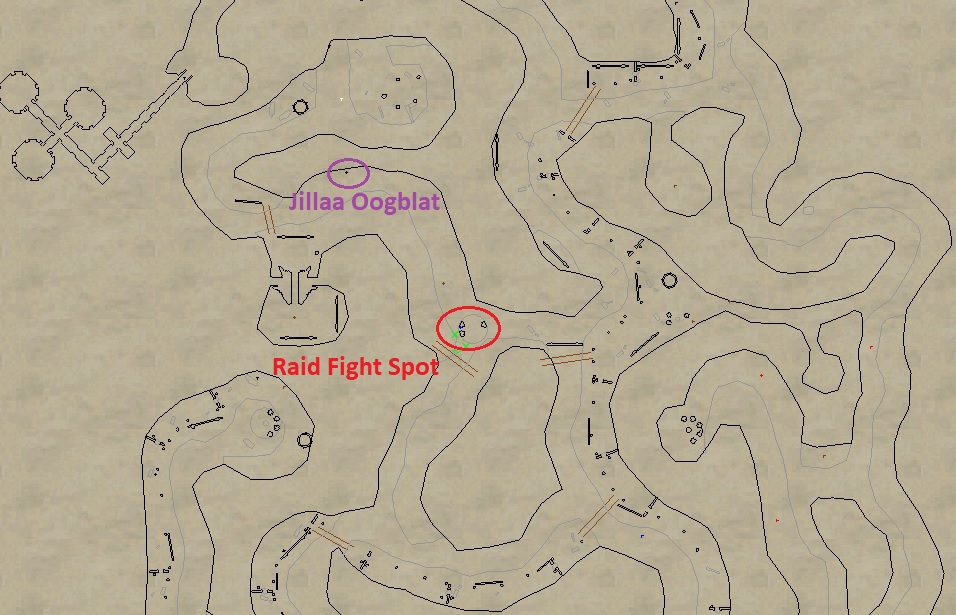
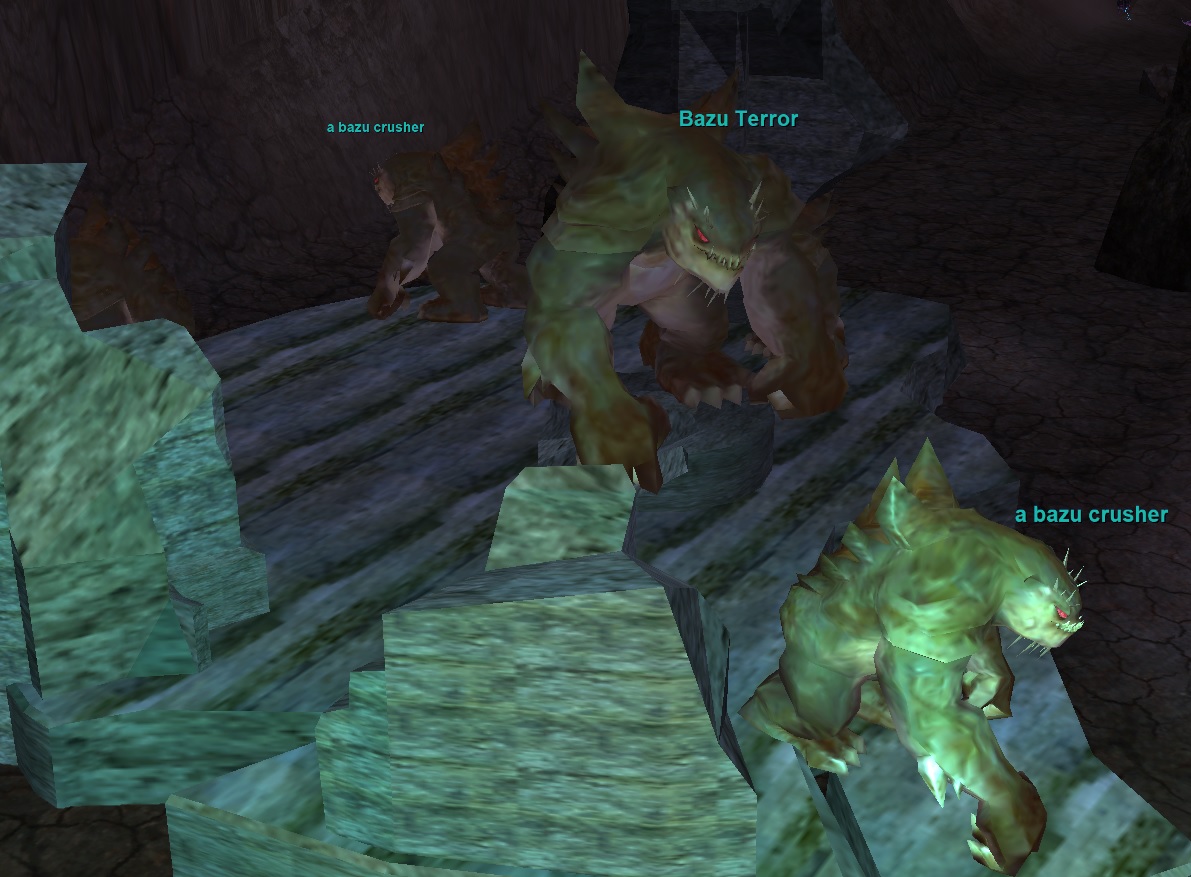
1) Go to Nobles’ Causeway with a raid and locate Jillaa Oogblat. “Hail” her to spawn Bazu Terror raid fight nearby. Kill Bazu Terror to spawn Discordling Dark Animist. Kill Discordling Dark Animist and loot ![]() Dark Animist Wand. Also loot
Dark Animist Wand. Also loot ![]() Feral Dust from Bazu Terror.
Feral Dust from Bazu Terror.
Bazu Terror
– Casts Explosion of Bone (PBAE, -100 all stats, 1000 DD, Small DoT, Magic Based)
– Casts Resonant Might (Single Target, 6 second stun, Magic Based)
– Hits 900+
4 guards also spawn
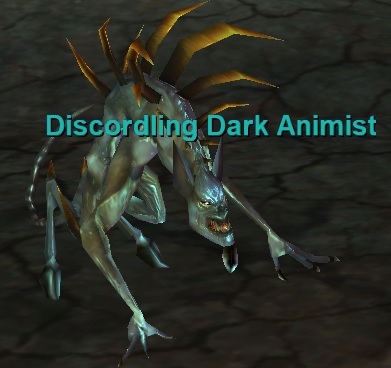
Discordling Dark Animist
– Casts Defiled Insanity (Single Target, -300 mana/tick, Mez, Magic Based)
– Casts Ancient Breath (PBAE, -40% Attack Speed, 250 DD, Disease Based, Disease Counter)
2) While still in Nobles’ Causeway, Give ![]() Dark Animist Wand to Jillaa Oogblat to receive emote:
Dark Animist Wand to Jillaa Oogblat to receive emote:
say “keep”

Step 10
Go back to Shar Vhal and locate Elder Animist Muada (-170, +460). Give him ![]() Feral Dust to receive emote. Say “i agree” to receive
Feral Dust to receive emote. Say “i agree” to receive ![]() Blended Elixir of Fortitude. A small script starts but you can just get the Elixir and move onto the next step.
Blended Elixir of Fortitude. A small script starts but you can just get the Elixir and move onto the next step.
Step 11
Go back to Nobles’ Causeway and locate Jillaa Oogblat. Give her ![]() Blended Elixir of Fortitude to receive emote:
Blended Elixir of Fortitude to receive emote:

Step 12
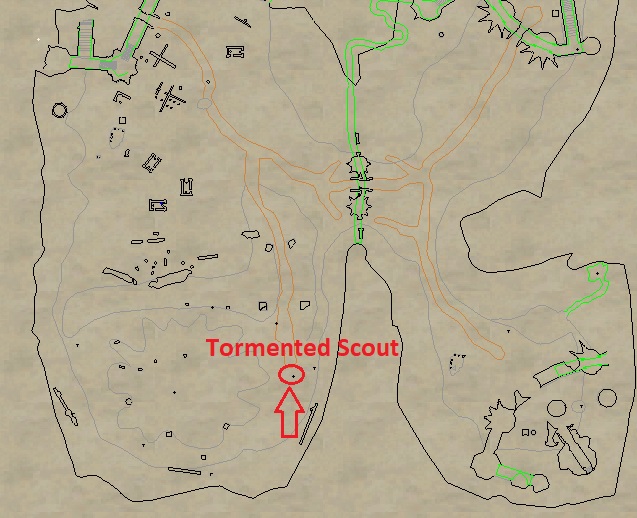
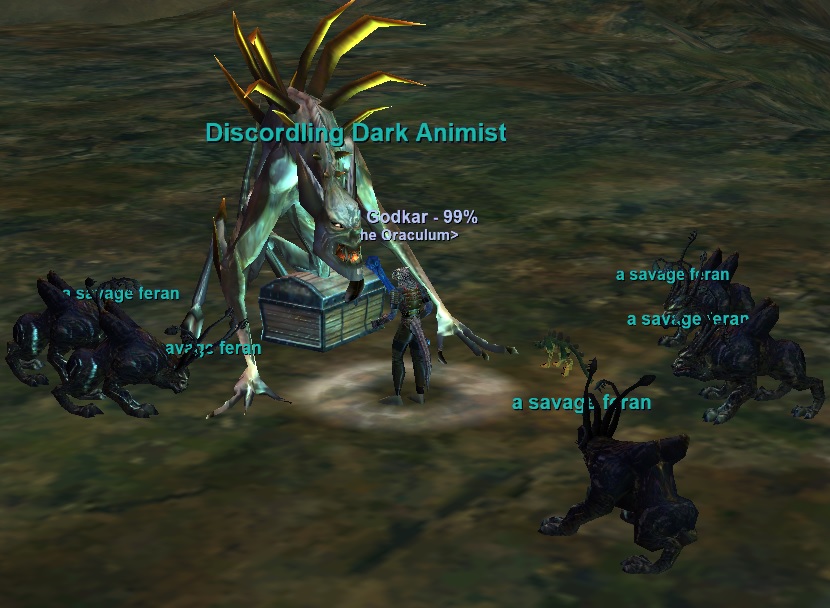
1) Go to The Bloodfields with a small to medium sized raid and locate Tormented Scout.
– “Hail” her
– Say “strong”
Discordling Dark Animist + adds will spawn. Kill it all and loot ![]() Gemmed Dark Animist Wand.
Gemmed Dark Animist Wand.
– Flurries
– Casts Silence of the Shadows (Targeted AE, Silence, Unresistable)
– Casts Call of the Ikaav (Single Target, Mez, -100 mana/tick)
– Casts Flames of the Fiend (PBAE, 2500 DD, Chromatic Based)
– The adds respawn twice when killed (so 3 waves of mobs per add). Fight them away from the boss to avoid his AE if possible.
2) Give ![]() Gemmed Dark Animist Wand to Tormented Scout to receive
Gemmed Dark Animist Wand to Tormented Scout to receive ![]() Wrapped Gemmed Wand.
Wrapped Gemmed Wand.

Step 13
Go back to Shar Vhal and locate Elder Animist Muada (-170, +460). Give him ![]() Wrapped Gemmed Wand.
Wrapped Gemmed Wand.
Step 14
Raid Anguish and obtain a ![]() Globe of Discordant Energy.
Globe of Discordant Energy.
Drops from the following events:
Keldovan the Harrier/Jelvan (only one of the two based on who you kill last)
Warden Hanvar/Ture (only one of the two based on who you kill last)
Arch Magus Vangl
Overlord Mata Muram
Step 15
Go back to Shar Vhal and locate Elder Animist Muada (-170, +460). Give him ![]() Spiritbound Totem and
Spiritbound Totem and![]() Globe of Discordant Energy to receive
Globe of Discordant Energy to receive ![]() Sealed Letter from Muada.
Sealed Letter from Muada.
Step 16
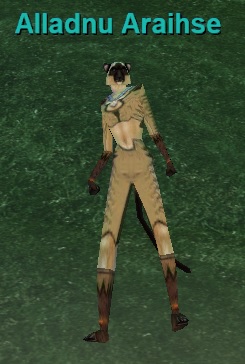
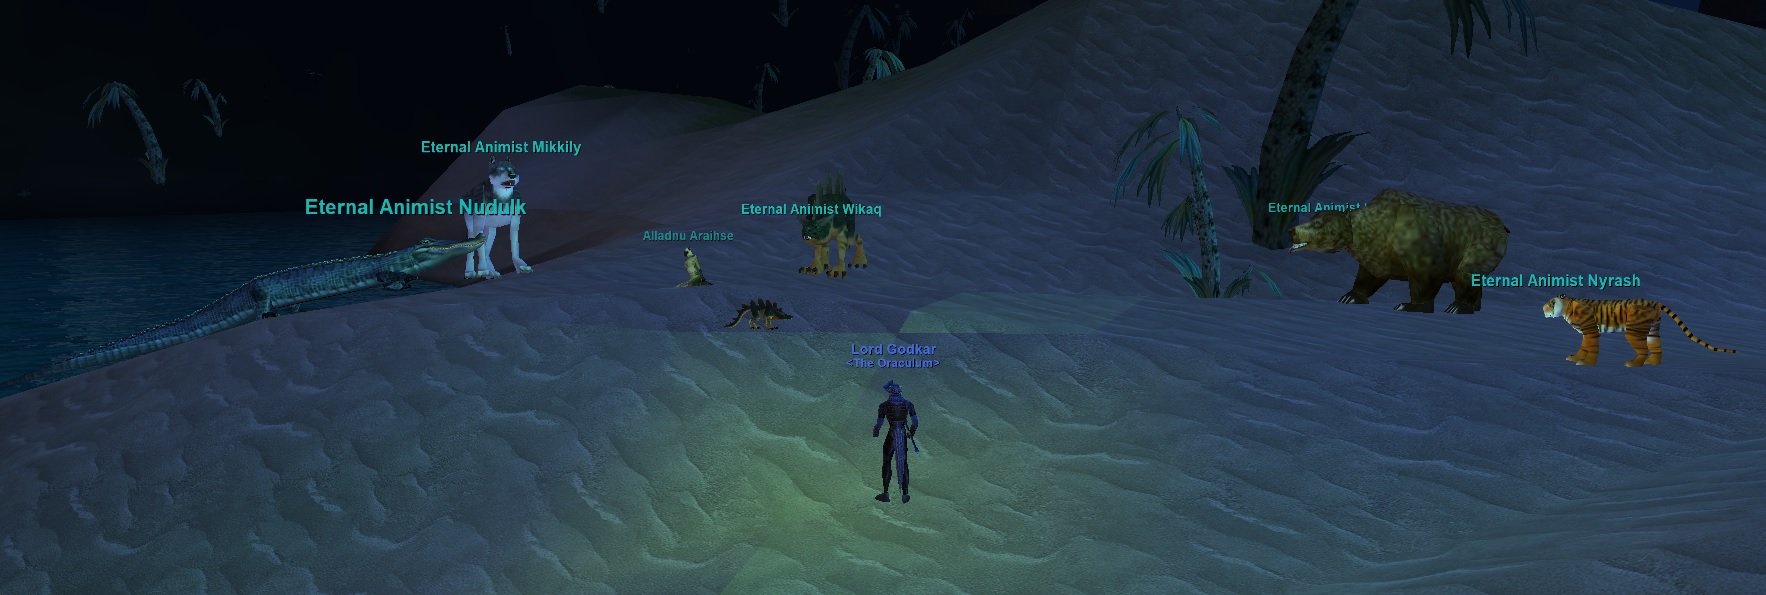
Go to Hollowshade Moor and locate Alladnu Araihse (-620, +1400). Give her ![]() Sealed Letter from Muada and your
Sealed Letter from Muada and your ![]() 1.5 Epic: Savage Lord’s Totem. This will start a script. Follow her. This script takes about 10 minutes to complete. Five “Elder Amimists” spawn and go through dialogue during the script. Be patient.
1.5 Epic: Savage Lord’s Totem. This will start a script. Follow her. This script takes about 10 minutes to complete. Five “Elder Amimists” spawn and go through dialogue during the script. Be patient.
Eventually you’ll see and emote where you can respond – Say “ready” to receive your ![]() 2.0 Epic: Spiritcaller Totem of the Feral!
2.0 Epic: Spiritcaller Totem of the Feral!


Thanks for using EQProgression!