Uqua, The Ocean God Chantry
Raid Guide![]()
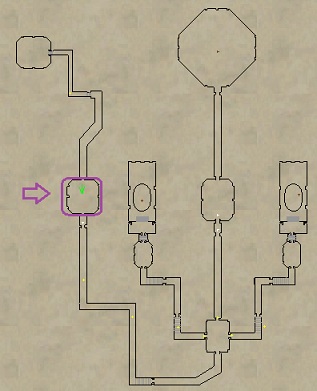
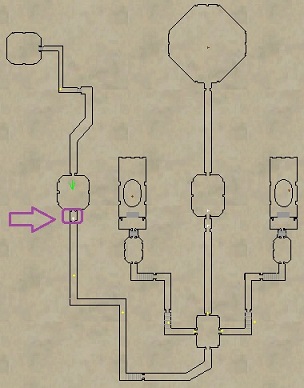
You can find the Uqua instance in Yxtta:

Overview
YouTube Video Guide >> HERE <<
1) Upon zoning in the first thing you’ll notice is a the zone-wide constant debuff ![]() Aura of Destruction. This AE goes off every 90 seconds and will land on all raid members. It is pointless to cure it as it has approx 300 counters and will recast anyway, so we’ll need a way to get rid of it.
Aura of Destruction. This AE goes off every 90 seconds and will land on all raid members. It is pointless to cure it as it has approx 300 counters and will recast anyway, so we’ll need a way to get rid of it.
As you kill trash mobs clearing the hallways you’ll notice some TEMPORARY items drop. Raid members can equip these to become immune to ![]() Aura of Destruction. There are different items based on your class type. Prioritize giving them to important raid members first. They are Ranged slot usable so that’s typically the best slot to put it in. They are NO TRADE on most standard servers.
Aura of Destruction. There are different items based on your class type. Prioritize giving them to important raid members first. They are Ranged slot usable so that’s typically the best slot to put it in. They are NO TRADE on most standard servers.
Kill all trash along the way.
Immunity Items Link
![]() Aura of Destruction
Aura of Destruction
-Lowers Spell Damage by up to 20%
-100 Intellect
-100 Wisdom
-250 Stats
-Snare
-300 Attack
2) Whenever a raid member dies in this dungeon a vengeful spirit will spawn in its place. These trash mobs can be nasty. They proc Spirit’s Touch. These adds can cause the raid to spiral out of control quickly so it is important to play safely here. Note that they will despawn shortly after spawning.
Spirit’s Touch
-Single Target
-40% Spell Haste
-300/HP Tick DoT
-20% Slow
-70% Snare
-1000 DD
-350 Chromatic Based
-210 Curse Counter
3) There are “traps” in the hallways throughout the zone. When clearing trash mobs be aware that there are extra mobs will spawn from these traps and path around. Make sure to kill all mobs in the zone as you go. If you don’t you may not be able to proceed at certain points. The traps do not appear to respawn.
Step 1
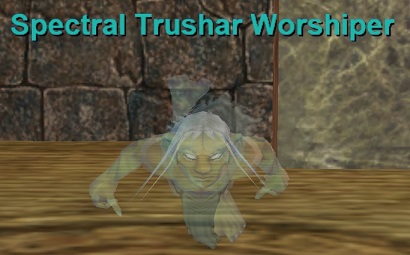
Once you approach the first big room you’ll see Spectral Trushar Worshiper in the water. Kill him. He drops some quest items for the Cragbeast Queen Quests. He hits 1200+ and is slowable and has approx 100K HP.
Note: You can chain farm this guy if needed by dropping and requesting a new instance after killing him. He is also charmable.
Step 2
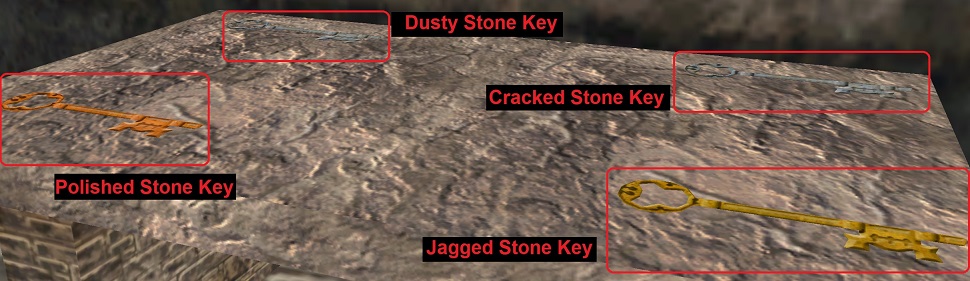
The next room is a small cubby known as “Gas Chamber 1“. Make sure your entire raid is in the room before attempting to proceed or clicking on anything. In this room you’ll see 4 keys on the table.
Your raid will begin to get emotes about the keys on the table (more on this soon). Each key is different and you’ll need to use the correct one to open the door ahead. If you choose the wrong one ![]() Detonation will go off. This is a PBAE that does 4500 DMG (-350 Fire Based). It can go off multiple times from 1 wrong click so it can take out a raid pretty fast.
Detonation will go off. This is a PBAE that does 4500 DMG (-350 Fire Based). It can go off multiple times from 1 wrong click so it can take out a raid pretty fast.
Have 1 person in the raid as the designated Key Master. This person will use one of the keys on the table on the door ahead based on the emotes the raid receives. You put the key in your inventory and click on the door. If you have more than 1 key in your bags at a time you will not be able to open the door unless you put it on your cursor and press “U”. The keys on the table respawn approx. every 50 seconds so if you need to throw them on the ground don’t worry too much.
If you click the door with 4 in your bags but don’t put one on your cursor and press “U” then you’ll get this emote:

Emotes will be sent out to players at random so your raid will need to communicate with each other quickly. If you are too slow and click the door after another emote goes off the raid will get hit with ![]() Detonation’s.
Detonation’s.
Two of the emotes can be ignored:

Two other emotes indicate which key will open the door. One will give an option of two keys, which gives you a 50/50 chance at choosing the right key (from what I can tell):

The other gives you the correct key:

If successful the door will open and you can continue.
Step 3
Continue killing hallway trash until you reach the next room. Here you’ll find a spirit guardian and 2x behemoths. The behemoths wont be attackable until you speak to a spirit guardian.
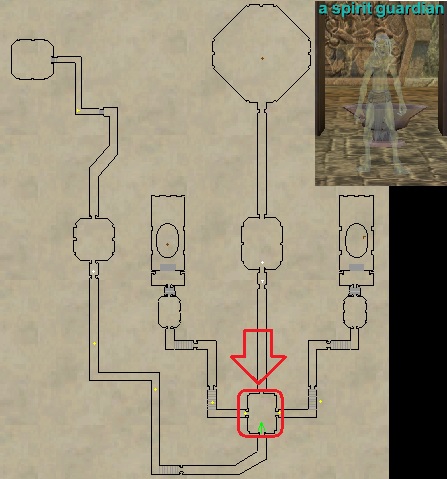
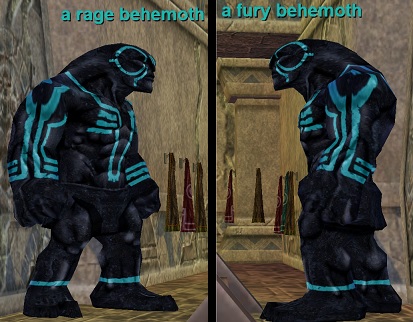
Say “ready” to a spirit guardian to trigger the fight with the behemoths. They both attack at the same time so be ready with multiple tanks. Kill them both to open the east and western doors of the room. a rage Behemoth AE Rampages. a fury behemoth flurries.
Hit 2500+ (35 Heroic Stamina)
Both Slowable
Approx. 200K HP each
Step 4
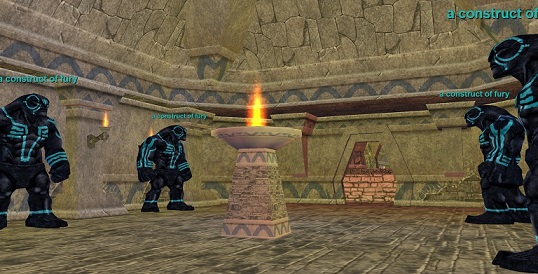
1) Clear the trash in the eastern and western hallways. At the end of each hallway are 4x constructs. These guys are tougher than the regular trash mobs. They are of similar difficulty to the 2x behemoths in Step 3.
The “a construct of fury” ones on the east side flurry.
The “a construct of rage” ones on the west side AE Rampage.
Hit 2500+ (35 Heroic Stamina)
Slowable
Approx. 200K HP each
Warning: The constructs respawn after sometime (Approx. 30 minutes). When they do the named are no longer attackable until these constructs are killed again.
2) Once all the trash is clear in both hallways split your raid into 2 groups and assign them to the east and west rooms (see map). There is a boss on each side.
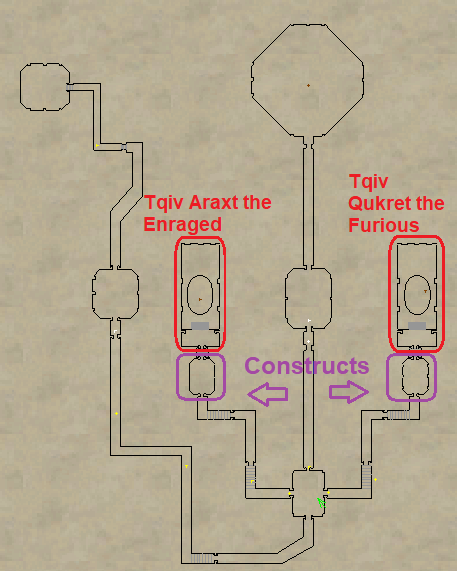
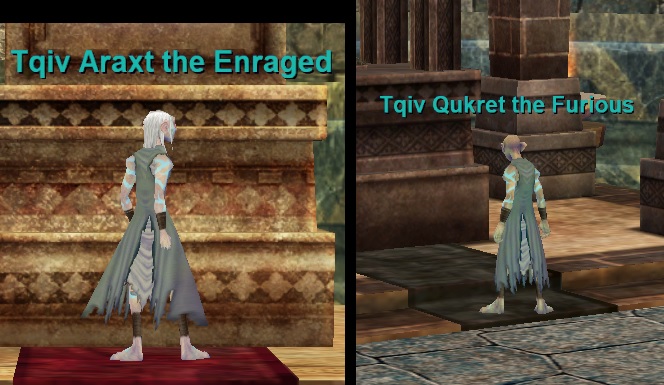
Tqiv Araxt the Enraged is in the west room.
Tqiv Qukret the Furious is in the east room.
Once one dies, the other needs to die within 30 seconds or it will get substantially stronger. They are leashed to their rooms. Players will occasionally be teleported between rooms. If you get teleported just roll with it and stay on the side you get teleported to.
Tqiv Qukret the Furious
Hits 1900+ (35 Heroic Stamina)
Flurries
700K HP
Slowable
Casts Wave of Fury (PBAE, 1750 DD + Spin Stun, -375 Magic Based)
Casts Intoxicating Fury (Single Target, Drunk Effect/Need 400 Alcohol Tolerance to avoid drunk + 2000 DD, Unresistable)
Casts Withering Destruction (Single Target, 2000 DD/-300 HP + Mana Drain, 36 Disease Cure, -400 Disease Based)
Tqiv Araxt the Enraged
Hits 1900+ (35 Heroic Stamina)
400K HP
Slowable
AE Rampage
Rampage
Casts Destructive Will (PBAE, -400 Mana Drain DoT, -18 Disease Cure, 2 min recast)
Casts Afterthoughts of Anger (PBAE, -20% Spell Haste/2000 DD/40% Snare, -250 Chromatic Based, 60 sec recast)
Casts Force of Trusik’s Rage (Single Target, 15 sec stun/5000 DD, -350 Magic Based)
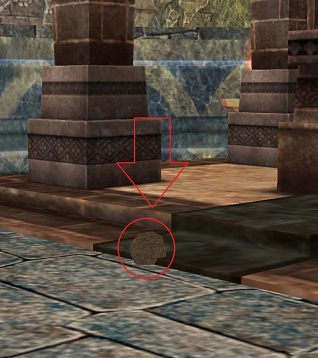
3) When both bosses die, a ground spawn will spawn under each of their initial spawn points. Have a person loot each. It does not have to be the same person. These will be used in Step 6.
![]() Orb of Fury
Orb of Fury![]() Orb of Rage
Orb of Rage
Step 5
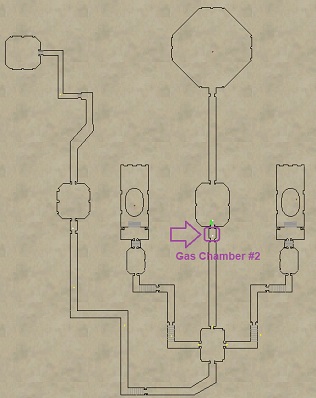
You can now advanced to the final center hallway. Clear trash until you reach the next room. Half way up the hallway is Gas Chamber #2. This works in the same manner as the Gas Chamber #1 in Step 2. However the keys are in a different place on the table.

Step 6
1) Once past the Gas Chamber #2 you’ll be in a room with non-aggro 3 mobs. You will want to turn in ![]() Orb of Fury and
Orb of Fury and ![]() Orb of Rage into each of their respective mobs (Specter of Fury and Specter of Rage). Doing so will spawn 7x trash mobs. Kill them and head into the north hallway.
Orb of Rage into each of their respective mobs (Specter of Fury and Specter of Rage). Doing so will spawn 7x trash mobs. Kill them and head into the north hallway.

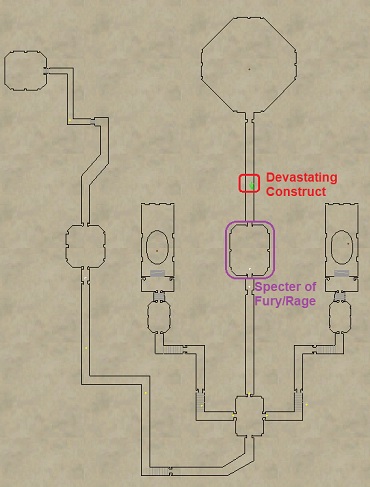
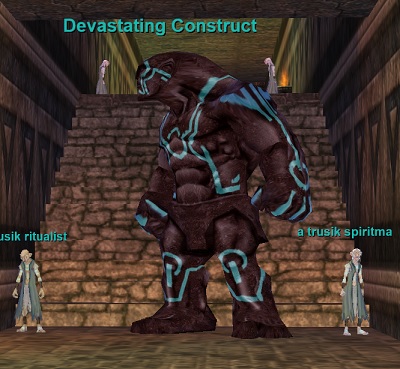
2) You’ll see Devastating Construct in the north hallway. Kill it.
Note: If you didn’t kill all mobs in the zone (including hallway traps) prior then Devastating Construct may not spawn.
Hits 3200+
300K HP
Slowable
AE Rampage
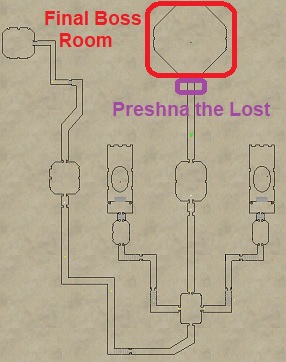
Step 7
In the northern most room is the final boss. You’ll see Preshna the Lost in front of the door. Say “ready” to open the door and start the event.

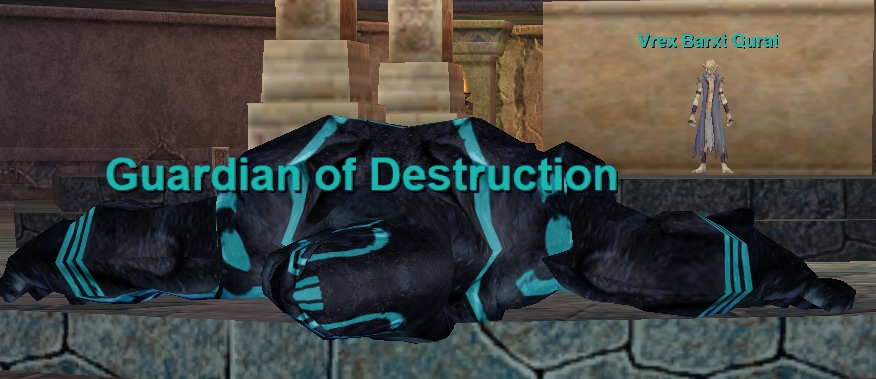
Inside is Vrex Barxt Qurat and Guardian of Destruction. When you get close Guardian of Destruction attacks. Start killing it, when it reaches 70% HP Vrex Barxt Qurat will also attack. Offtank Vrex Barxt Qurat and continue killing Guardian of Destruction.
Guardian of Destruction procs a Feign Death on the tank so be ready to have multiple tanks on him. Additionally, Withering Destruction will hit various raid members randomly.
– Withering Destruction (Single Target, 2000 DD/-300 HP + Mana Drain, 36 Disease Cure, -400 Disease Based)
Once Guardian of Destruction hits 70% HP and Vrex Barxt Qurat spawns you have 3 minutes to kill Guardian of Destruction off before he and Vrex Barxt Qurat go inactive and a dozen or so adds spawn. You can kill the adds and continue the event, but you’ll want to avoid this at all costs. This happens every 3 minutes so you need to kill Guardian of Destruction within 3 minutes no matter what to proceed. You must kill Guardian of Destruction before Vrex Barxt Qurat or fail the event!
There is a second 3 minute timer once the Guardian of Destruction dies. You must also kill Vrex Barxt Qurat within 3 minutes of the Guardian of Destruction death or risk Vrex Barxt Qurat going inactive and a bunch of adds spawning again.
Once Guardian of Destruction is dead start killing Vrex Barxt Qurat.
When Vrex Barxt Qurat is at roughly 40 HP% 2x a destructive channelers spawn. Keep them away from the raid and kill them after the boss is dead. They cast several nasty spells, so you may want to have a knight team kite them away while the rest of the raid finishes off Vrex Barxt Qurat.
a destructive channeler
Approx. 250K HP
Cast Druid spells
Also casts the same spells as Tqiv Qukret the Furious and Tqiv Araxt the Enraged from Step 4, such as Damage, Mana Drain, Snare, Increased Cast time, and additional damaging AEs.
Guardian of Destruction
Estimated 1.3 Million HP
Slowable
Hits 3400+ (35 Heroic Stamina)
Procs Destructive Crush (Single Target, Feign Death, 1500 DD, -300 Prismatic Based)
Vrex Barxt Qurat
Estimated 1.1 million HP
Cannot be slowed
Flurries
AE Rampage
Hits 3000+ (35 Heroic Stamina)
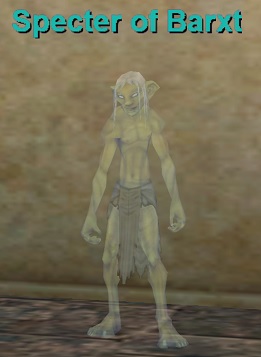
When complete Specter of Barxt spawns on the shrine. Hail him to receive ![]() Fragment of the High Temple! This is part of the Qvic and Txevu flagging process.
Fragment of the High Temple! This is part of the Qvic and Txevu flagging process.

Thanks for using EQProgression!